Difference between revisions of "PAJ7620U2 Gesture Recognition Sensor SKU: CQRSENSS001"
(→Raspberry Pi Application) |
(→Raspberry Pi Application) |
||
| Line 82: | Line 82: | ||
The colors of wires may be different, please connect it according to the silk screen printing. | The colors of wires may be different, please connect it according to the silk screen printing. | ||
| − | [[File:CQRSENSS001- | + | [[File:CQRSENSS001-5.jpg|400px]] |
---- | ---- | ||
Revision as of 15:05, 19 January 2022
Description
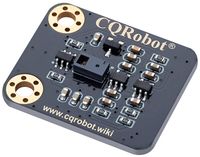
I am a gesture recognition module based on PAJ7620U2, which can directly recognize 9 basic gestures, supports I2C interface, and is compatible with 3.3V/5V level. Compared with APDS-9960 and other solutions, I have faster recognition speed, higher accuracy, more gesture recognition, and stronger anti-interference, which is suitable for low-power application scenarios such as smart home and robot interaction.
Specificationn
3D Gesture Sensor Specifications
- Operating Voltage: 3.3V/5V
- Communication Interface: I2C
- Recognition Distance: 5cm to 15cm
- Supported Gestures: up, down, left, right, forward, backward, clockwise, anticlockwise, shake.
- Recognition Rate: 240Hz
- Recognition Angle: 60 Degree (diagonal)
- Ambient Light Immunity: Less Than 100k Lux
- Dimensions: 23.14mm * 27.76mm
- Mounting Hole Size: 3.0mm
Ocean Interface Cable Specifications
- Cable specifications: 22AWG
- Material: Silicone
- Withstand Voltage: Less Than 50V
- Withstand Current: Less Than 1000MA
- Length: 21cm
- Line Sequence: Black-Negative Power Supply, Red-Positive Power Supply, Green-SDA, Blue-SDA, Yellow-INT.
DataSheet
Media: PAJ7620U2 General Datasheet.pdf
Raspberry Pi Application
- Insert the Micro SD card of Raspberry Pi to host PC.
- Copy the Rapberry Pi folder to boot directory of the micro SD card.
- Start your Raspberry Pi with the Micro SD card
- You can find that the Raspberry Pi codes are saved in the BOOT directory.
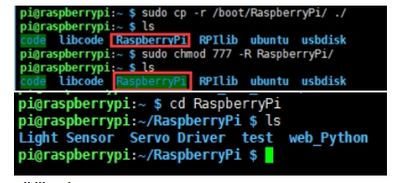
- Copy the folder to home directory
sudo cp -r /boot/RaspberryPi/ ./
sudo chmod 777 -R RaspberryPi/
cd RaspberryPi
Install libraries
- BCM2835:
wget http://www.airspayce.com/mikem/bcm2835/bcm2835-1.64.tar.gz
sudo tar zxvf bcm2835-1.64.tar.gz
cd bcm2835-1.64
sudo ./configure
sudo make
sudo make check
sudo make install
- Install wiringPi
sudo apt-get install git
sudo git clone git://git.drogon.net/wiringPi
cd wiringPi
sudo ./build
- Install python
sudo apt-get install python-pip
sudo pip install RPi.GPIO
sudo pip install spidev
sudo apt-get install python-imaging
sudo apt-get install python-smbus
sudo apt-get install python-serial
Enable I2C
sudo raspi-config
- Choose Interfaceing Options -> I2C -> Yes
Hardware Connection
The colors of wires may be different, please connect it according to the silk screen printing.


